Introduction
Every home needs cleaning, but how can you make it easier? Well with the right strategies and a few clever tricks, you can transform your cleaning routine into a quick and efficient process.
Here are 29 genius cleaning hacks that will change the way you handle everyday cleaning tasks in 2024. From the kitchen to the bathroom, these smart and affordable methods will help you maintain a spotless home with minimal effort.
Discover these innovative solutions and make your home shine like never before!
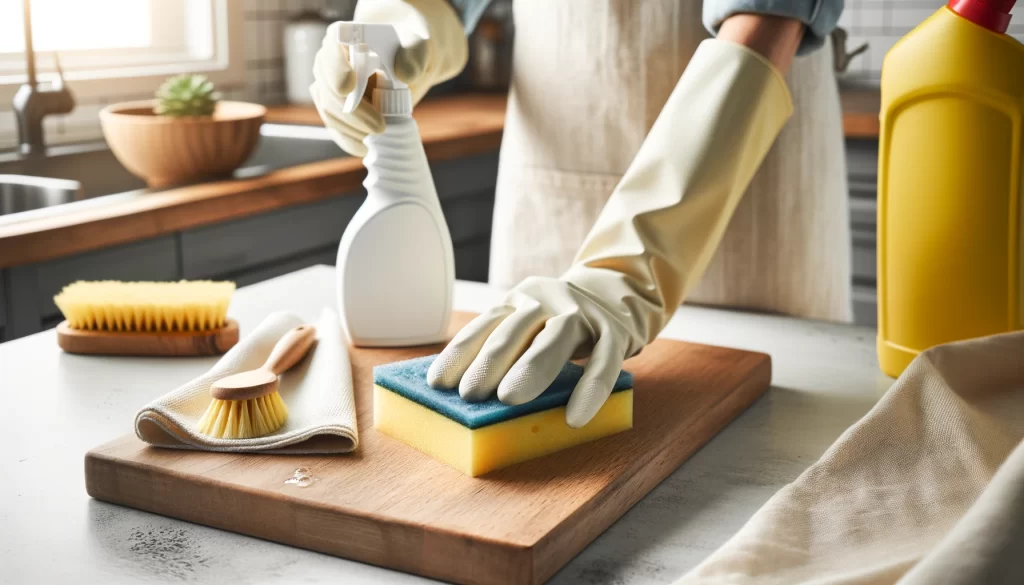
⚠️ Safety Warning!
Some of these cleaning hacks involve the use of chemicals. Please be careful when handling these substances. Always use gloves, ensure good ventilation, and keep all cleaning solutions out of reach of children and pets.
Disclaimer
This article is affiliated free, there are no product suggestions so enjoy it. Also, throughout this article, we have included several embedded YouTube videos to help you see these cleaning hacks in action.
If you use an ad blocker you may not see the embedded videos in the article. So if you want to see some of these hacks in action, turning off the ad blocker may help you thanks.
Table of Contents
1. Use a Robot Vacuum

Using a robot vacuum is an effortless way to keep your floors clean. Simply activate it before you leave the house, and let it do the work for you. Even an affordable model can make a significant difference in maintaining a tidy home.
Benefits:
- Effortless Cleaning: Cleans floors automatically with minimal effort.
- Consistent Cleanliness: Keeps floors consistently clean, enhancing the overall tidiness of your home.
- Time-Saving: Allows you to focus on other tasks while the vacuum cleans.
Steps:
- Ensure the robot vacuum is charged and ready to use.
- Press the start button (usually with a toe for convenience) before you leave the house.
- Let the robot vacuum clean the floors while you’re away.
- Empty the dustbin and clean the filters regularly to maintain performance.
Materials: Robot vacuum
2. Airing Out Your Bed in the Morning

Before making your bed in the morning, pull the blankets back and let the sheets be exposed to air and ideally sunlight. This helps to dry any sweat and kill bacteria that thrive in the slightly damp, dark environment of the sheets.
Benefits: Reduces Moisture: Allows the sheets to dry out, reducing moisture. Kills Bacteria: Sunlight and air exposure help kill bacteria and mites. Improves Freshness: Keeps your bed fresher for longer.
Steps:
- Pull back blankets and a comforter to expose the sheets.
- Open curtains to allow sunlight to hit the sheets.
- Let the sheets air out for at least 20 minutes before making the bed.
Materials: None
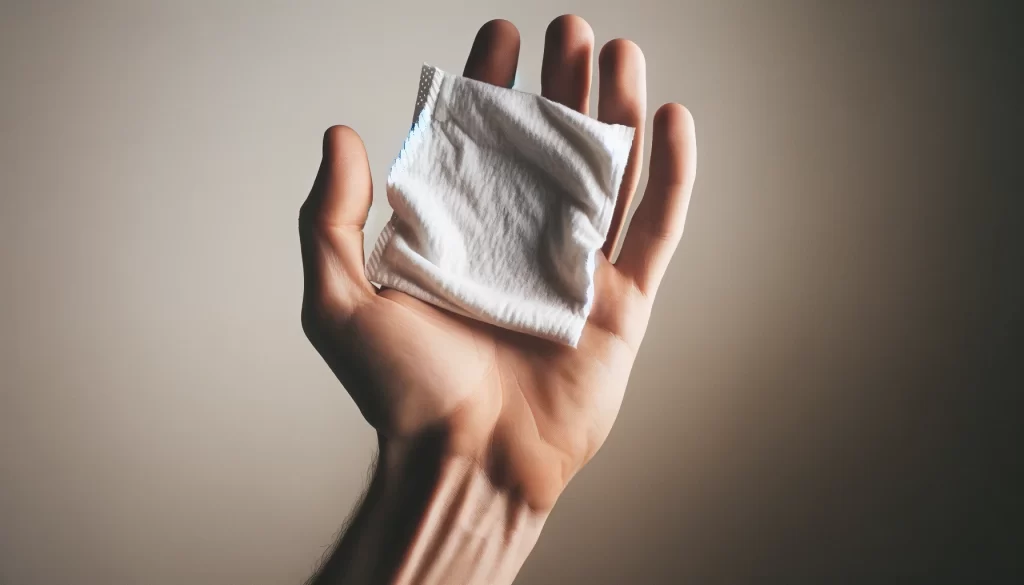
3. DIY Toilet Bombs
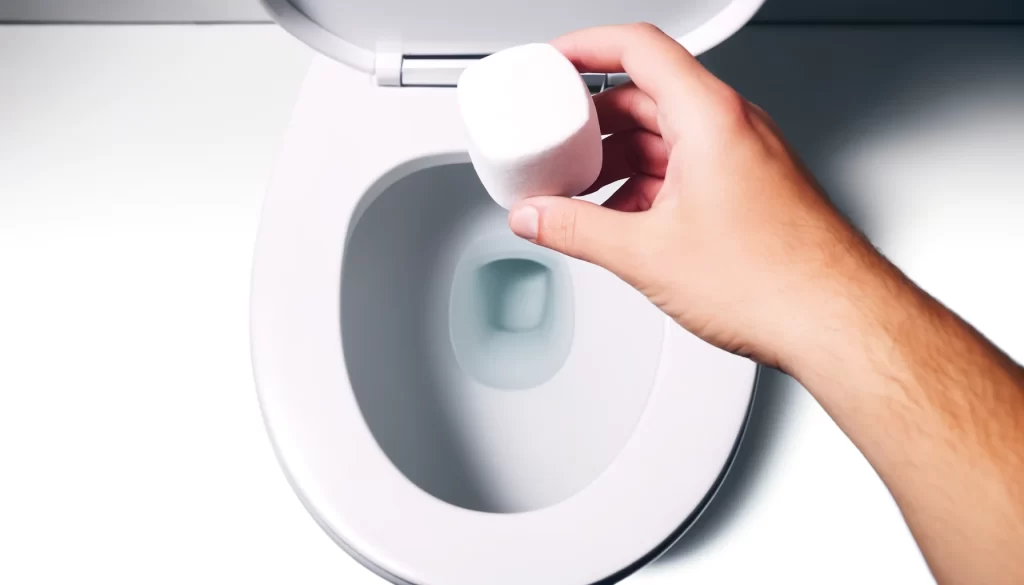
Create your toilet bombs using citric acid, baking soda, and a little water. These natural cleaners provide an effective and fizzy clean.
Benefits: Natural Ingredients: Avoids harsh chemicals found in commercial cleaners. Effective Cleaning: Provides a fizzy action that cleans effectively.
Steps:
- Mix one part citric acid with one part baking soda in a bowl.
- Add a small amount of water to create a moldable mixture.
- Pack the mixture into silicone ice cube trays and let it dry overnight.
- Drop one toilet bomb into the toilet bowl for cleaning.
Materials: Citric acid, baking soda, water, silicone ice cube trays
4. Clean between the Glass on Your Oven Door
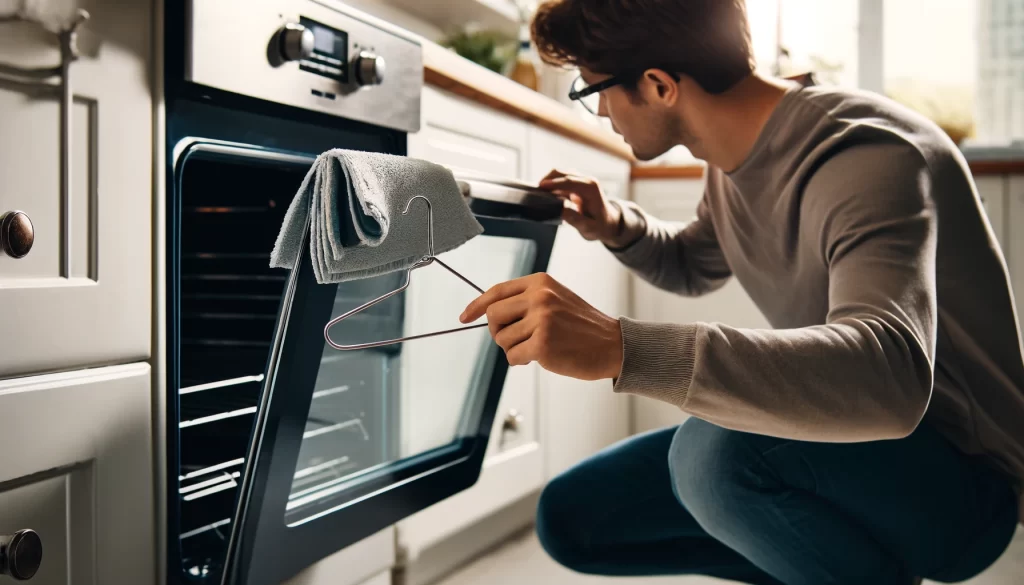
Cleaning the space between the glass on your oven door can be tricky, but using a wire hanger can make it much easier. This method allows you to remove grime and streaks, giving you a clear view of your oven.
Benefits: Clear View: Improves visibility into the oven. Easy to Execute: Simple method that doesn’t require disassembly.
Steps:
- Remove the drawer from below the oven.
- Use a wire hanger to create a cleaning contraption.
- Lay down on the floor and look under the door of your oven to find slots between the oven door and window glass.
- Slide the cleaning contraption through the slots, moving side to side to clean between the glass.
- Repeat as necessary to achieve a streak-free finish.
Materials: Wire hanger, cleaning cloth
If you want to see this hack in action and learn more, you can watch the embedded YouTube video down below.
5. Use a Bagel to Clean Old Paintings
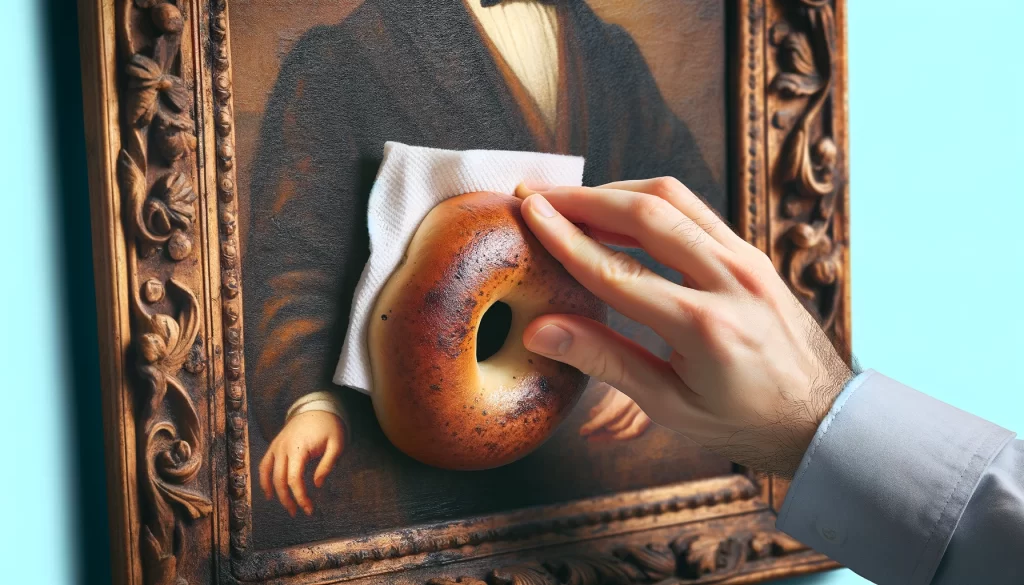
Using a bagel to clean old paintings can be an effective and gentle method. The soft side of the bagel acts like a sponge, lifting grime and dirt without damaging the painting.
Benefits: Gentle Cleaning: Safe for delicate artwork. Effective: Removes grime and dirt effectively.
Steps:
- Rub the soft side of the bagel gently over the surface of the painting.
- Do not apply too much pressure; gently run the bread all over the surface.
- The bagel acts like a sponge, picking up grime and dirt without damaging the painting.
Materials: Bagel (soft side)
6. DIY Ice Pack
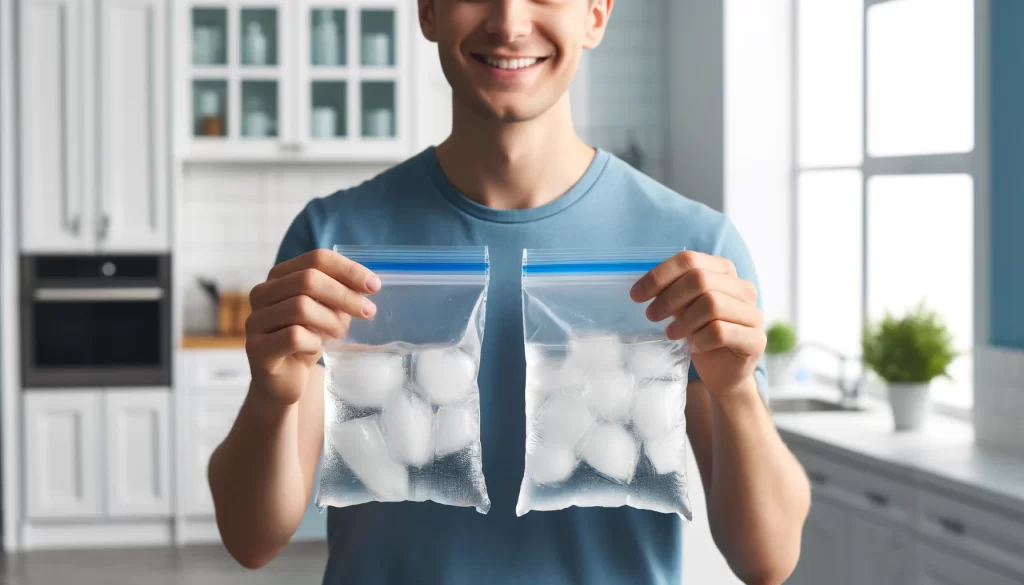
Creating a DIY ice pack with water and rubbing alcohol is a simple and cost-effective solution. The mixture creates a pliable ice pack that can mold to the body, providing effective relief for injuries.
Benefits: Pliable: Molds to the body for better coverage. Cost-Effective: Cheaper than commercial ice packs.
Steps:
- Mix two parts of water and one part of rubbing alcohol in a zipper-lock freezer bag.
- Seal the bag, ensuring as much air is removed as possible.
- Place the bag in the freezer.
Materials: Water, rubbing alcohol, zipper-lock freezer bag
7. Clean a Shower Head
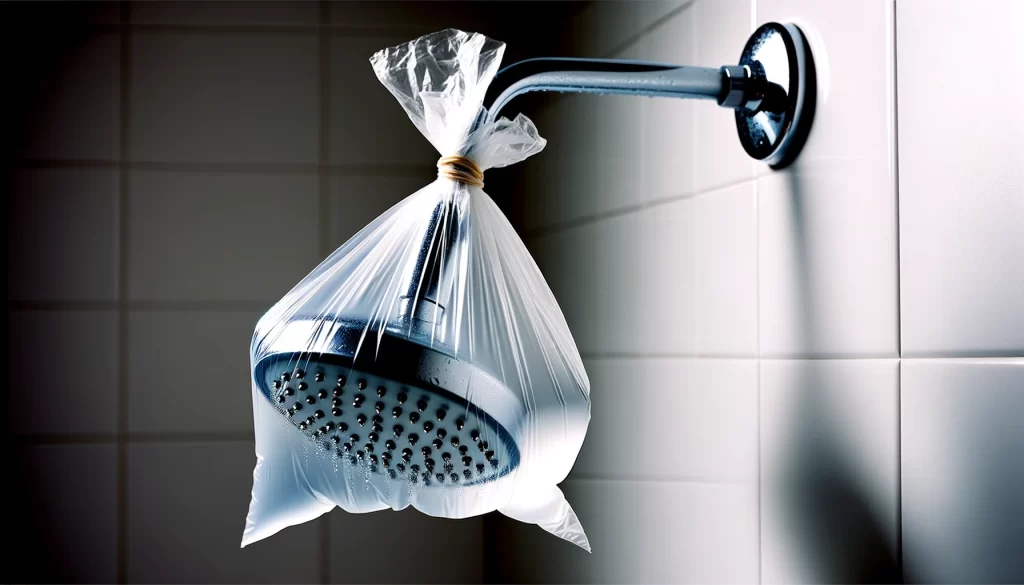
Removing hard water buildup from your shower head can improve water flow and efficiency. Using white vinegar is a natural and effective method.
Benefits: Improved Water Flow: Removes buildup that blocks water flow. Natural Solution: Uses vinegar, a natural cleaner.
Steps:
- Fill a plastic bag with white vinegar.
- Affix the bag to the shower head with an elastic band.
- Leave it overnight.
- Remove the bag, dump the vinegar, and run the shower to rinse.
Materials: White vinegar, plastic bag, elastic band
8. Aluminum Foil Scrubby
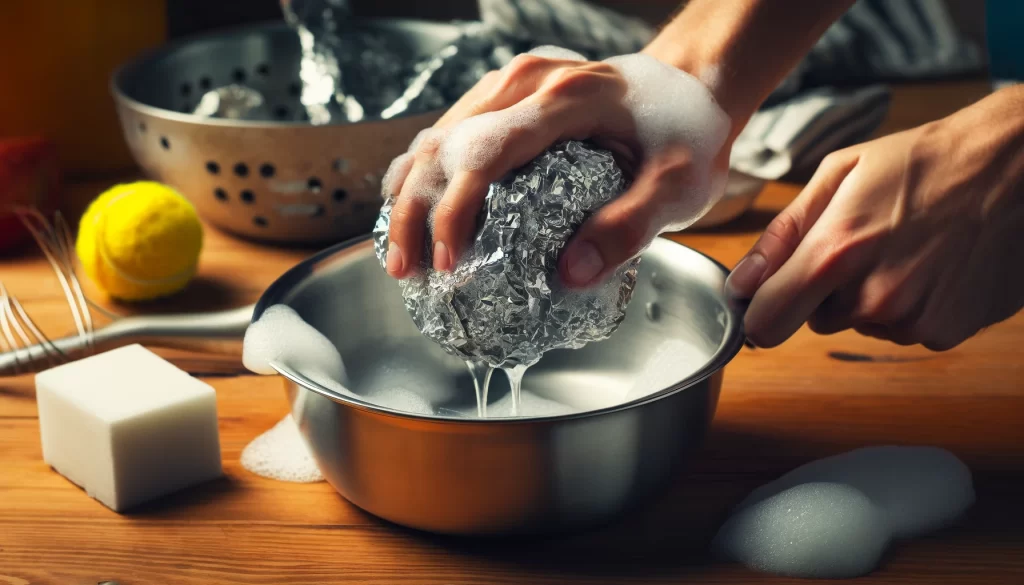
Using aluminum foil to scrub pots and pans is an effective way to remove stubborn food residues. This method repurposes used aluminum foil, making it an eco-friendly solution.
Benefits: Effective: Removes stubborn food residues. Eco-Friendly: Repurposes used aluminum foil.
Steps:
- Crumple the aluminum foil into a ball.
- Add dish soap and water to the pot or pan.
- Use the foil ball to scrub away stuck-on food and grime.
Materials: Aluminum foil, dish soap, water
9. Microwave Your Sponge
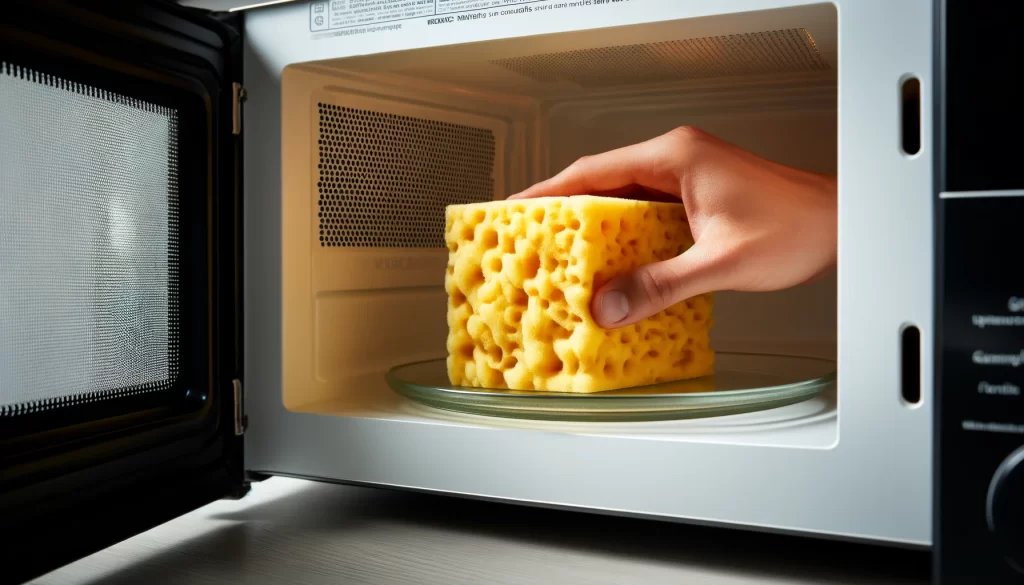
Sanitizing your kitchen sponge in the microwave is a quick and effective method to kill germs and bacteria.
Benefits: Sanitizes: Kills 99% of germs and bacteria. Quick: Only takes two minutes.
Steps:
- Place the sponge in the microwave.
- Microwave on high for two minutes.
- Let it cool before handling.
Materials: Kitchen sponge, microwave
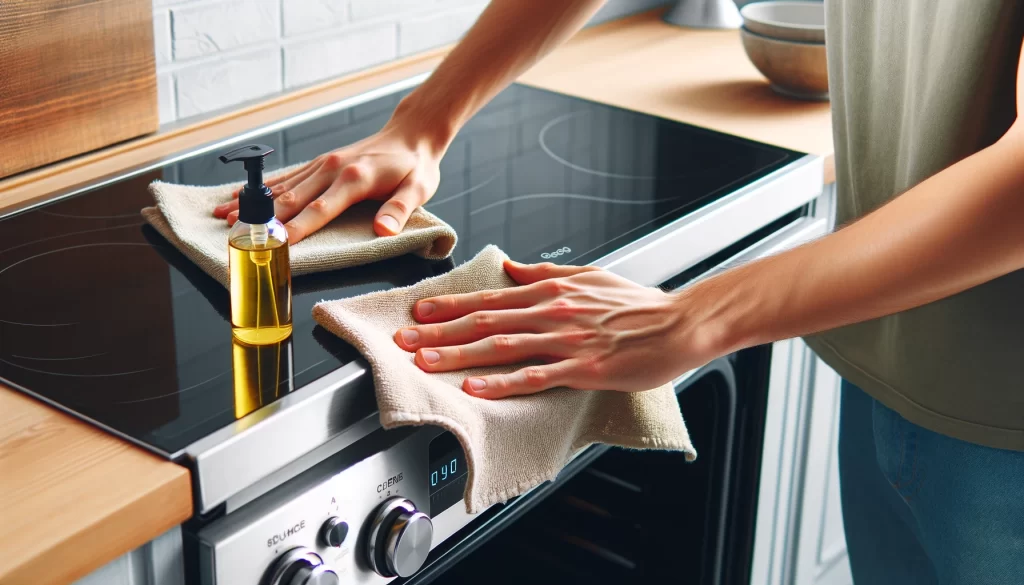
10. Wipe Down Kitchen Counters After Each Use
Keeping your kitchen counters clean by wiping them down after each use helps prevent buildup and makes deep cleaning easier.
Benefits: Prevents Buildup: Keeps counters clean and hygienic. Easy Maintenance: Makes deep cleaning less frequent and easier.
Steps:
- After using the counter, take a clean cloth or sponge.
- Wipe down the surface to remove any crumbs, spills, or residues.
- Use a mild cleaning spray if needed for sticky spots or stains.
Materials: Clean cloth or sponge, cleaning spray (optional)
11. Unclog a Kitchen Sink with Baking Soda, Salt, Warm Vinegar, and Boiling Water
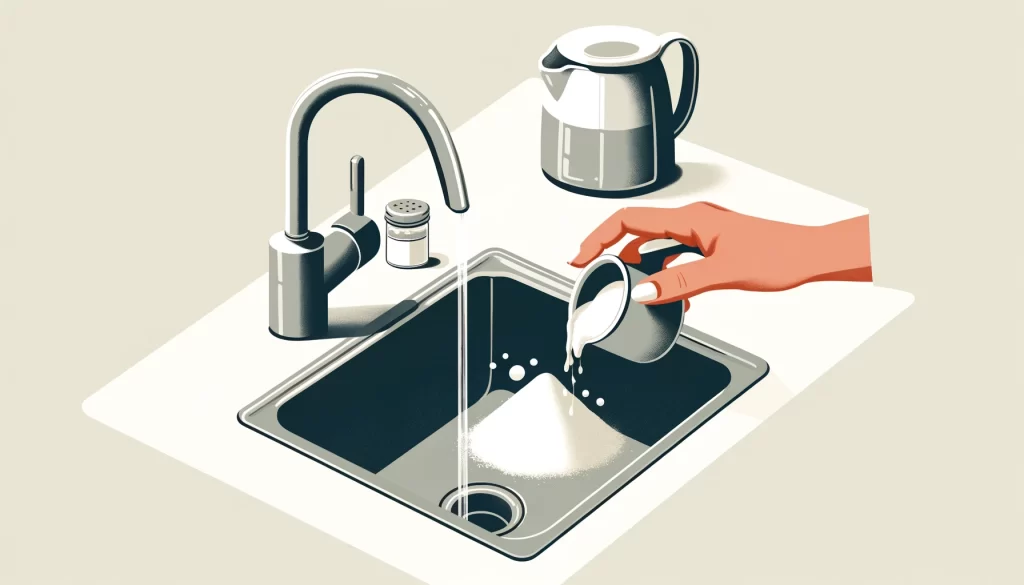
Using a combination of baking soda, salt, warm vinegar, and boiling water is an effective and natural way to unclog a kitchen sink.
Benefits: Natural: Uses common household items. Effective: Dissolves grease and debris.
Steps:
- Pour 1/2 cup of baking soda and 1/2 cup of salt down the clogged drain.
- Heat 1 cup of white vinegar until warm and pour it down the drain.
- Allow the mixture to sit for 15-30 minutes.
- Pour a kettle of boiling water down the drain to flush away loosened debris.
Materials: Baking soda, salt, white vinegar, boiling water
If you want to see this hack in action, you can watch the embedded YouTube video here.
12. Use a Shower Squeegee to Clean the Rug
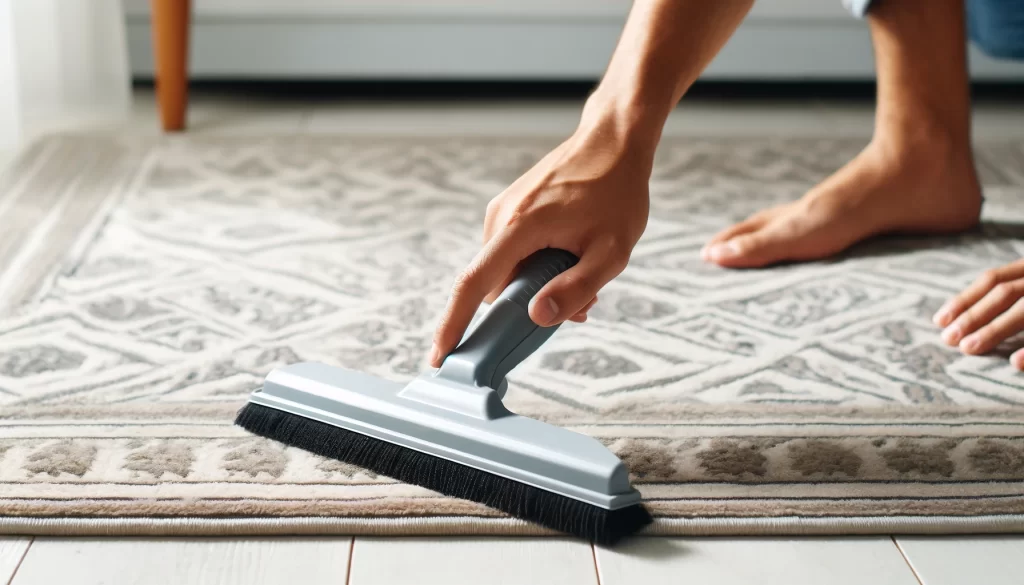
A shower squeegee can effectively lift embedded debris from rugs, making it easier to maintain their appearance.
Benefits: Effective: Lifts embedded debris. Easy: Simple method for cleaning rugs.
Steps:
- Run the squeegee across the rug in overlapping strokes.
- Collect and dispose of the dirt and hair accumulated by the squeegee.
Materials: Shower squeegee
13. Clean Windows on Cloudy Days
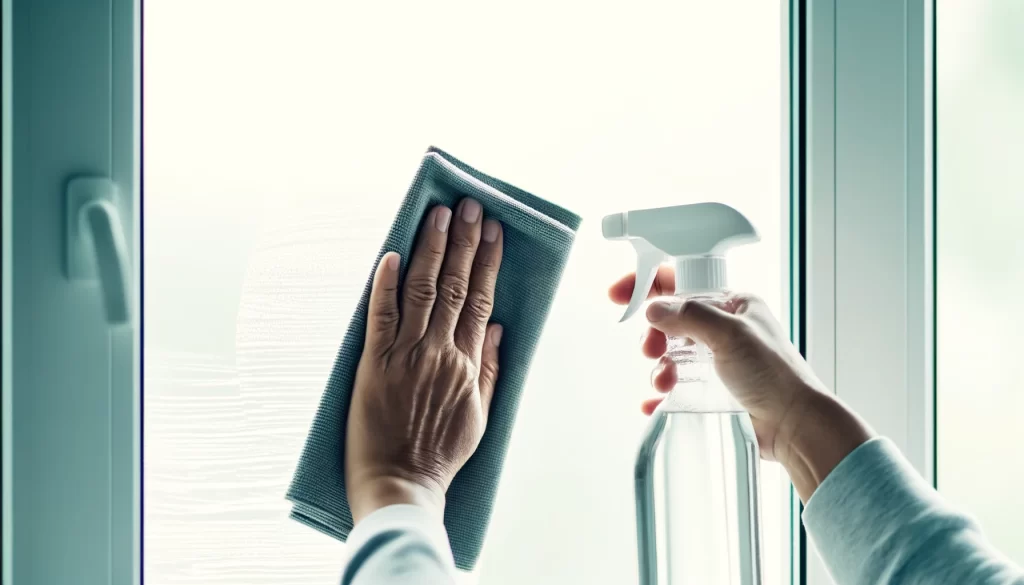
Cleaning windows on cloudy days or in the shade helps prevent streaks, ensuring a clearer finish.
Benefits: Streak-Free: Reduces streaks for a clearer finish. Effective: Ensures better cleaning results.
Steps:
- Fill a spray bottle with a 50/50 mixture of white vinegar and water.
- Spray the solution onto the windows.
- Wipe dry with a lint-free microfiber cloth.
Materials: White vinegar, water, spray bottle, lint-free microfiber cloth
14. Clean Your Microwave With Lemon Halves
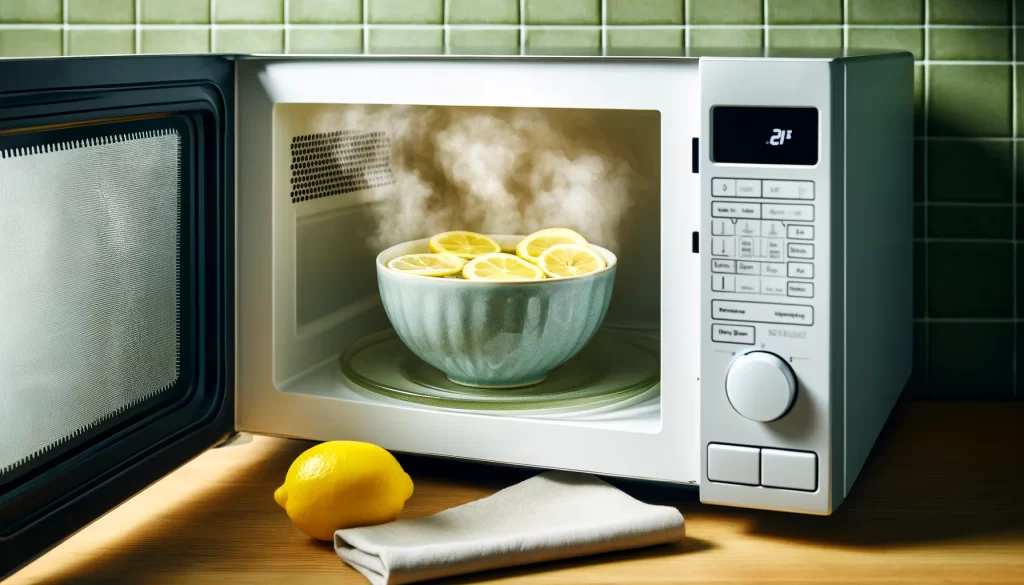
Using lemon halves to clean your microwave is an effective and natural method. The steam from the lemons loosens any particles, making it easy to wipe down, and leaves a fresh scent.
Benefits:
- Natural Cleaner: Uses fresh lemon juice and boiling water.
- Loosens Particles: Steam helps to loosen any stuck-on particles.
- Fresh Scent: Leaves your microwave smelling fresh and clean.
Steps:
- After using fresh lemon juice for a recipe, save the lemon halves.
- Place the lemon halves in a microwave-safe bowl.
- Pour boiling water over the lemons into the bowl.
- Place the bowl in the microwave and cook on high for 5 minutes.
- Let the steam do its work to loosen any particles inside the microwave.
- Carefully remove the bowl and wipe down the interior of the microwave with a clean cloth.
Materials: Lemon halves, boiling water, microwave-safe bowl, clean cloth
15. Clean an Oven Tray with Baking Soda and Hydrogen Peroxide
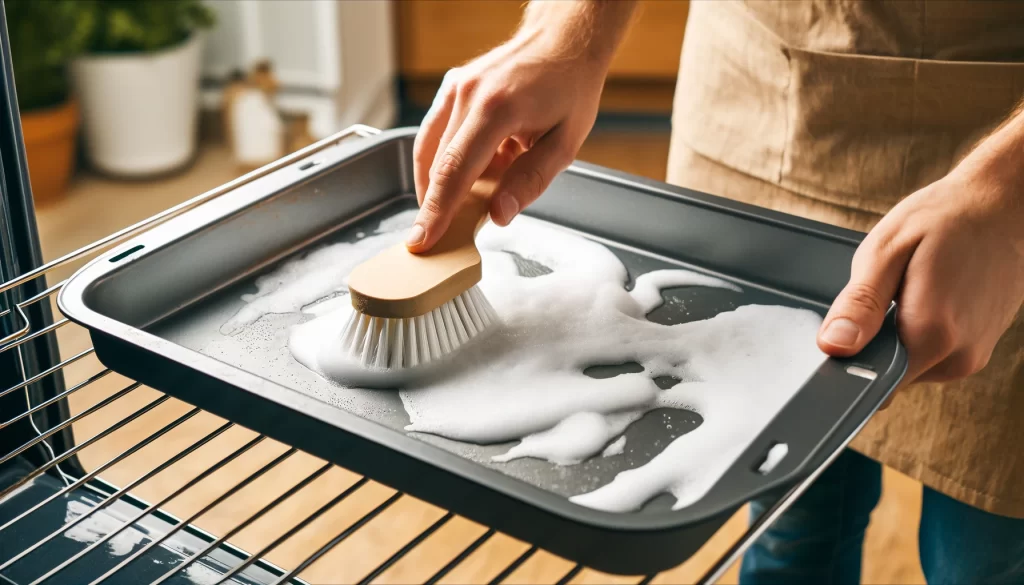
Cleaning an oven tray with a mixture of baking soda and hydrogen peroxide effectively removes tough stains and grime.
Benefits:
- Powerful Cleaner: Effectively removes tough stains and grime.
- Easy to Use: Simple ingredients and process.
- Non-toxic: Uses common household items without harsh chemicals.
Steps:
- Mix equal parts baking soda and hydrogen peroxide to form a paste.
- Apply the paste to the oven tray and let it sit for 30 minutes.
- Scrub the tray with a brush or sponge.
- Rinse with water and dry.
Materials: Baking soda, hydrogen peroxide, brush or sponge, water
If you want to see this hack in action, you can watch the embedded YouTube video
16. Clean Your Cast Iron Skillet

Properly cleaning your cast iron skillet helps maintain its seasoning and ensures it lasts for years.
Benefits:
- Maintains Seasoning: Keeps the skillet naturally non-stick.
- Long-Lasting: Proper care extends the life of the skillet.
Steps:
- Scrape away any bits or pieces of food and wipe it out.
- For stuck-on pieces, use a scrub brush or scouring pad. Avoid using soap.
- If food is still stuck on, add water to the skillet, turn it on to high, bring it to a simmer, and scrape up the pieces.
- Dry the skillet thoroughly with a lint-free towel.
- Drizzle some cooking oil in the skillet and wipe it completely with a lint-free towel or cloth. A little black residue is normal and part of the seasoning.
Materials: Scrub brush or scouring pad, water, lint-free towel, cooking oil
17. Use Vinegar to Remove Hard Water Spots
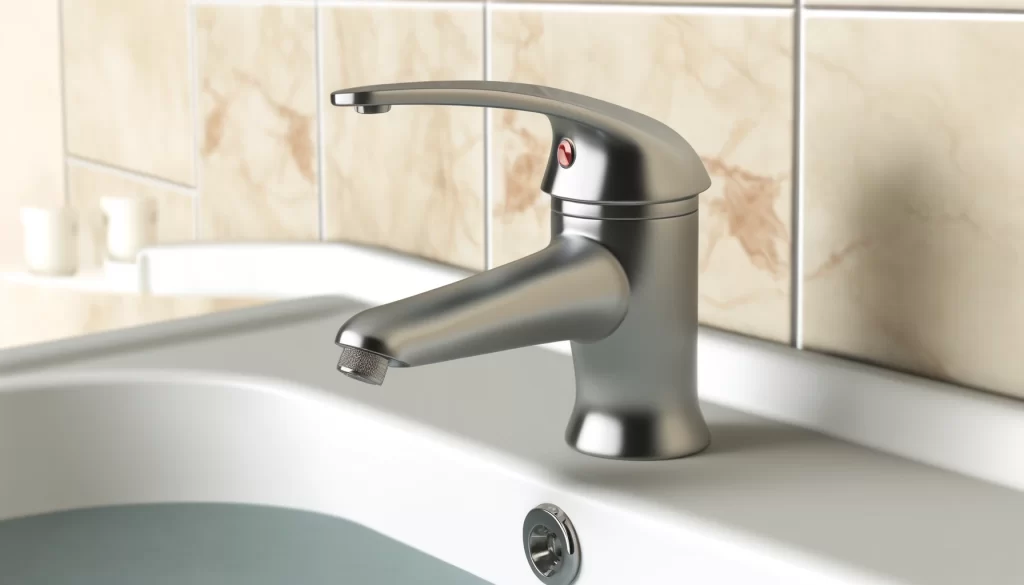
Vinegar is a versatile household item that excels at removing hard water spots.
Benefits:
- Effective: Removes hard water spots effortlessly.
- Versatile: Can be used in various areas around the home and garden.
- Natural Cleaner: Non-toxic and eco-friendly.
Steps:
- Fill a spray bottle with white vinegar.
- Spray the vinegar directly onto the hard water spots.
- Let it sit for a few minutes to break down the minerals.
- Wipe away the spots with a clean cloth.
Materials: White vinegar, spray bottle, clean cloth
18. Rubber Gloves for Pet Hair

When your vacuum isn’t doing the job right, rubber gloves can help. Simply put on rubber gloves and rub the areas full of pet hair. The static created by the rubber will gather the pet hair into clumps, making it easy to dispose of.
Benefits:
- Efficient: Quickly gathers pet hair.
- Eco-Friendly: Reusable and doesn’t require additional products.
- Easy to Use: Simple process with immediate results.
Steps:
- Put on a pair of rubber gloves.
- Rub your gloved hands over the carpet, upholstery, or any surface with pet hair.
- The rubber gloves will generate static, attracting the pet hair and gathering it into clumps.
- Rinse the gloves under running water to unstick the hair.
Materials: Rubber gloves
19. Socks to Clean Blinds
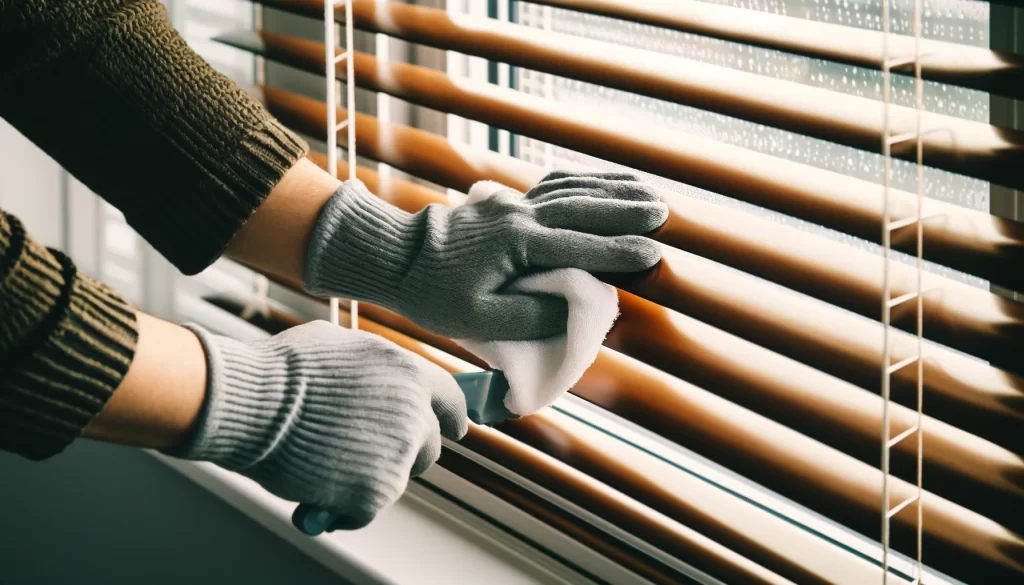
Window blinds seem to collect the worst of the stuff in the air: pollen, cooking grease, and dust. Using old socks to clean blinds is a simple and effective method.
Benefits:
- Efficient: Quickly removes dust and grime from blinds.
- Eco-Friendly: Reuses old socks.
- Easy to Use: Simple and immediate results.
Steps:
- Put an old sock over your hand.
- Dampen the sock with a little water or dish soap if the blinds are particularly greasy (like in the kitchen).
- Run your sock-covered hand over each slat of the blinds, cleaning both sides.
- Clean or swap out the sock regularly to avoid moving dust around.
Materials: Old socks, water or dish soap (optional)
20. Repurpose Dryer Sheets
Don’t throw out your used dryer sheets just yet! They are surprisingly versatile and can be repurposed for various household tasks.
Benefits:
- Multi-Use: Effective for various cleaning tasks.
- Eco-Friendly: Reuses dryer sheets.
- Convenient: Provides immediate results.
Uses:
- Remove Pet Hair: Wipe over clothes or furniture to remove pet hair.
- Dust Baseboards and Molding: Run them over baseboards and molding to lift and repel dust.
- Clean Window Blinds: Wipe blinds to keep them dust-free longer.
- Clean Ceiling Fan Blades: Wipe ceiling fan blades to remove dust.
- Dusting Cloth: Use as a dusting cloth for household surfaces.
- Freshen Up Drawers: Place in closets, drawers, or laundry baskets to keep them smelling fresh.
- Polish Stainless Steel and Chrome: Remove fingerprints and water spots from stainless steel appliances and chrome furniture.
Materials: Used dryer sheets
21. Sweep, Then Mop
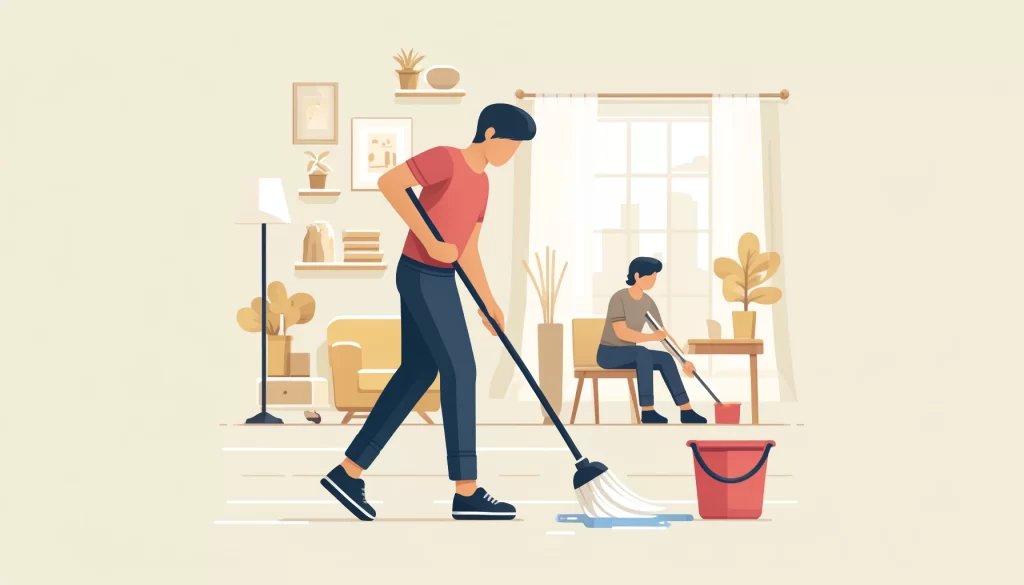
Sweeping or vacuuming floors before mopping ensures floors are free of loose dirt, preventing streaks and making mopping more effective.
Benefits: Cleaner Floors: Removes loose dirt and debris. Effective Mopping: Prevents streaks and ensures thorough cleaning.
Steps:
- Thoroughly sweep or vacuum the floor to remove loose dirt and debris.
- Prepare the mop and cleaning solution.
- Start mopping in the farthest corner of the room from the door.
- Mop in a backward motion, moving towards the door.
- Change water as needed to avoid spreading dirt.
Materials: Broom, vacuum, mop, cleaning solution
22. Keep Your Disposal Smelling Fresh
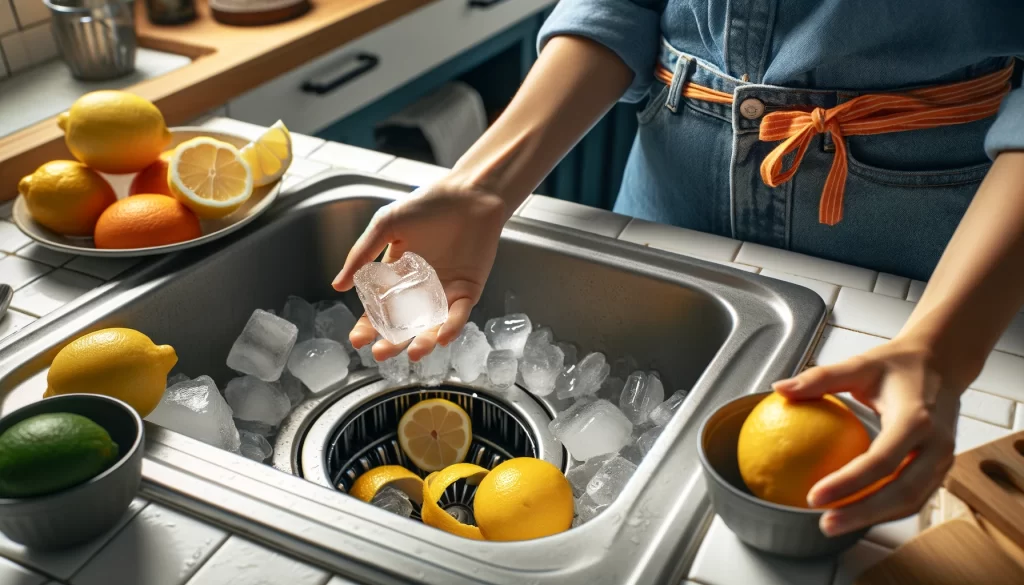
Combat unpleasant smells from your garbage disposal with these quick and effective hacks.
Benefits:
- Eliminates Odors: Removes foul-smelling bacteria and mold.
- Cleans Blades: Ice and citrus peelings help clean and grease the grinder blades.
- Freshens Up: Leaves your kitchen smelling fresh.
Steps:
- Ice Cleaning:
- Put a handful of ice down the drain.
- Turn on the disposal to clean off any gunk from the blades.
- Turn on the faucet to rinse as the ice melts away.
- Citrus Cleaning:
- Grind lemon, lime, or other citrus peelings in the disposal.
- This will help remove odors and grease the grinder blades.
Materials: Ice, citrus peelings (lemon, lime, etc.)
23. Use Alka-Seltzer for Toilet Cleaning
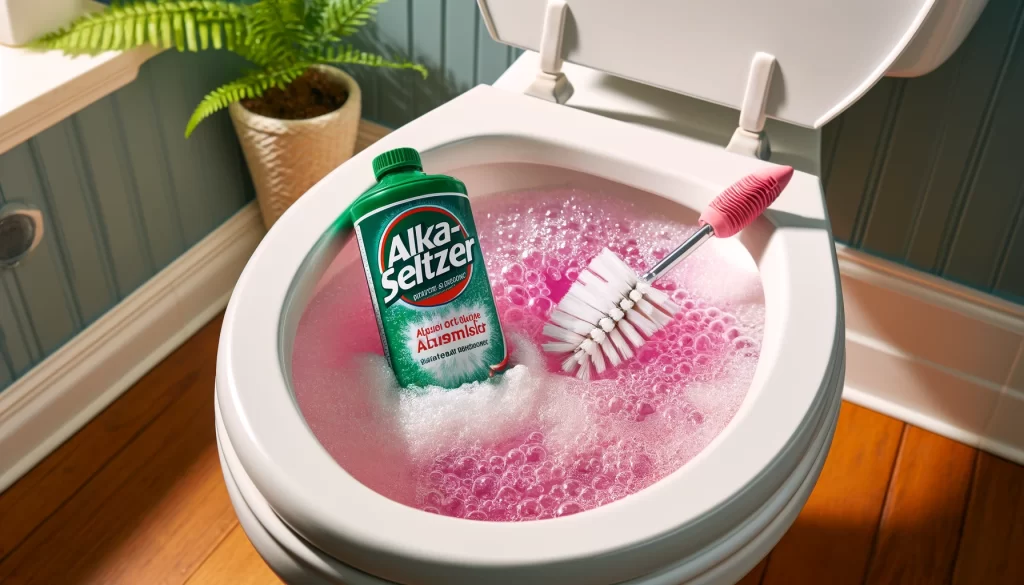
Using Alka-Seltzer tablets to clean the toilet provides a quick and effective solution, using the fizzing action to break down stains and deposits.
Benefits: Quick: Provides a fast and effective clean. Easy: Minimal effort required.
Steps:
- Drop two Alka-Seltzer tablets into the toilet bowl.
- Allow the tablets to fizz for a few minutes.
- Use a toilet brush to scrub the bowl.
- Flush the toilet to rinse away loosened debris and residue.
Materials: Alka-Seltzer tablets, toilet brush
24. Wash Your Oven Rack
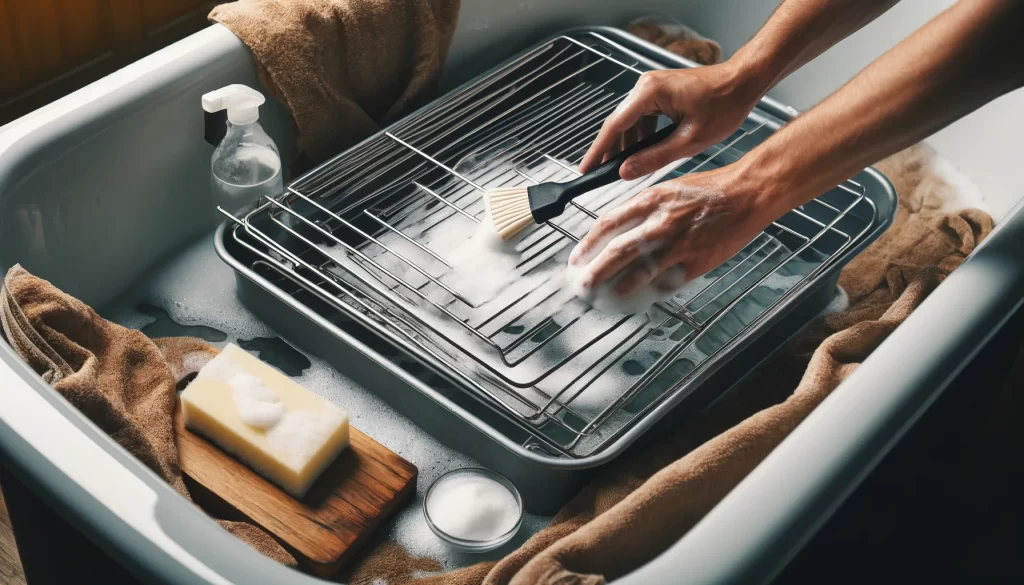
Keep your oven rack clean with this easy and effective method.
Benefits:
- Deep Clean: Removes tough grime and grease.
- Simple Process: Uses common household items.
Steps:
- Prepare the Tub: Line your bathtub with an old towel to prevent scratches.
- Soak the Racks: Place the oven racks in the tub, add a generous amount of dish soap, and pour in a cup of white vinegar.
- Let it Sit: Allow the racks to soak for a few hours, or better yet, overnight.
- Baking Soda Boost: For extra cleaning power, spritz distilled white vinegar on the racks and sprinkle with baking soda. Let it sit for several minutes.
- Scrub and Rinse: After soaking, scrub the racks with a brush or sponge to remove any remaining grime, then rinse thoroughly with water.
Materials: Old towel, dish soap, white vinegar, baking soda, brush or sponge
25. Use Perfume in a Vacuum Bag
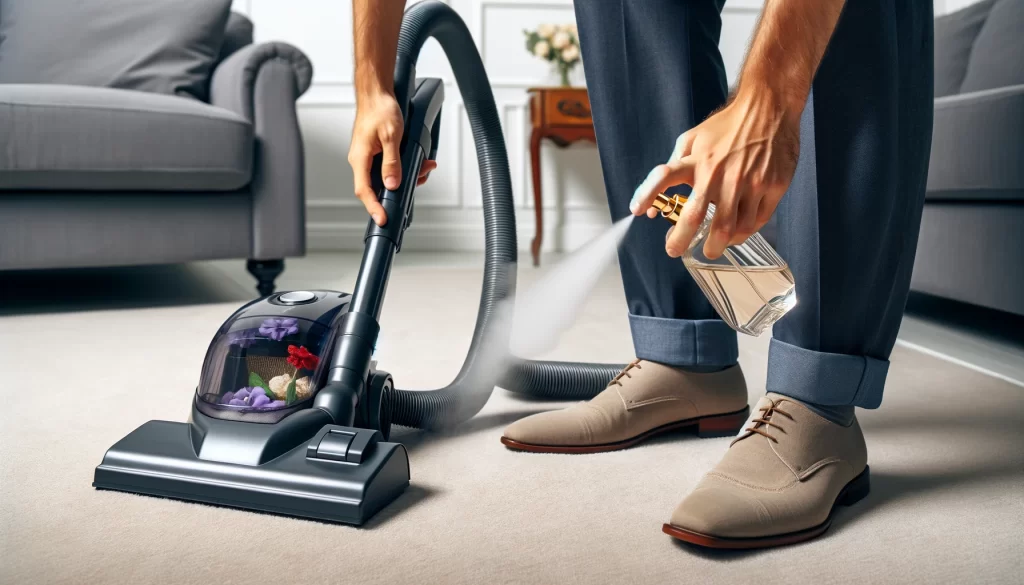
Spritzing a bit of your perfume in the vacuum bag leaves a pleasant fragrance in your home while you vacuum.
Benefits: Fresh Scent: Leaves a pleasant fragrance. Easy: Simple to implement.
Steps:
- Before vacuuming, open the vacuum bag compartment.
- Spritz a small amount of your favorite perfume into the bag.
- Close the compartment and proceed to vacuum as usual.
Materials: Perfume, vacuum with a bag
26. Use Baby Oil to Clean and Maintain Stove Hood
Using baby oil to clean the stove hood cuts through greasy dust and makes future cleanings easier.
Benefits: Effective: Cuts through greasy dust. Easy Maintenance: Simplifies future cleanings.
Steps:
- Apply a small amount of baby oil to a cloth.
- Wipe down the top of the stove hood to cut through greasy dust.
- For maintenance, wipe with a cloth for easy subsequent cleanings.
Materials: Baby oil, cloth
27. Clean Ceiling Fans with an Old Pillowcase
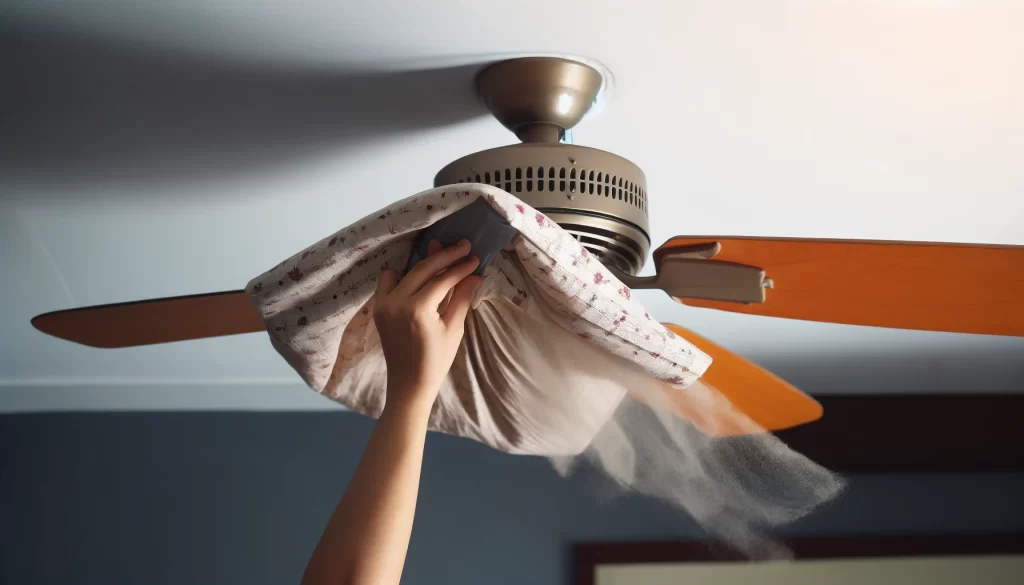
Using an old pillowcase to clean ceiling fan blades effectively captures dust and prevents it from falling onto furniture and floors.
Benefits: Effective: Captures dust effectively. Mess-Free: Prevents dust from falling onto furniture and floors.
Steps:
- Slide the pillowcase over one of the fan blades.
- Gently pull the pillowcase back, trapping the dust inside the case.
- Repeat for each blade.
- Shake out the pillowcase outside when finished.
Materials: Old pillowcase
28. Clean While You Cook
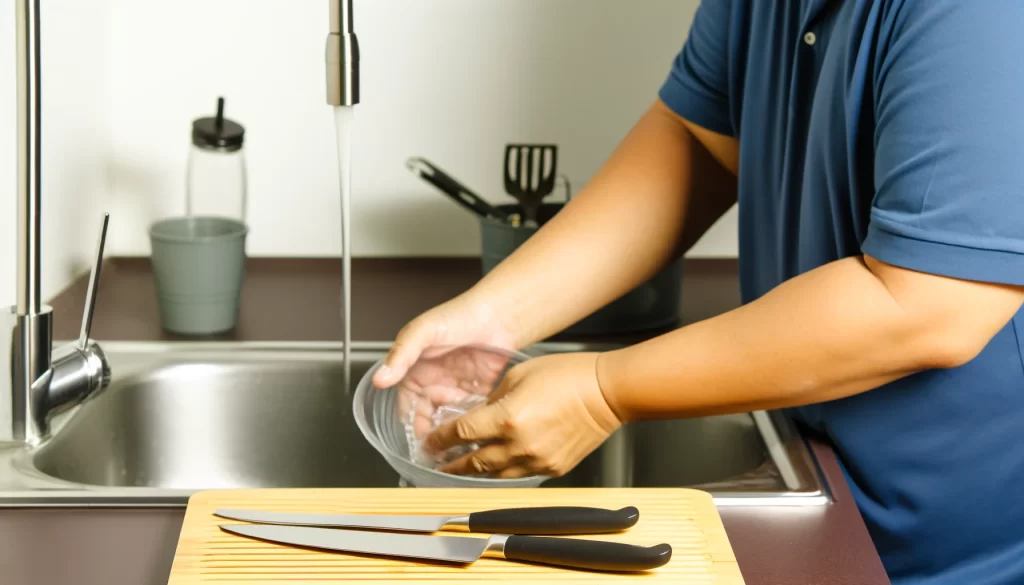
Cleaning as you go while cooking helps maintain a tidy kitchen and reduces cleanup time after cooking. This approach also makes your kitchen more functional and stylish, similar to strategies used in kitchen remodeling.
Benefits: Maintains Cleanliness: Keeps the kitchen organized. Reduces Cleanup Time: Makes post-cooking cleanup easier.
Steps:
- As you cook, wash utensils, bowls, and cutting boards immediately after use.
- Wipe down countertops and cooking surfaces regularly.
- Dispose of food scraps and packaging promptly.
- Keep a cloth or sponge handy to clean spills and splatters right away.
Materials: Cleaning cloth or sponge, dish soap, trash bin
29. Remove Adhesive and Permanent Marker with Rubbing Alcohol

Using rubbing alcohol to remove adhesive and permanent markers from various surfaces is an effective solution. If you’re planning to renovate your home, like a bathroom remodel, this hack can be especially useful.
Benefits: Effective: Removes sticky residues and stubborn marks. Convenient: Uses common household items.
Steps:
- Remove Adhesive: Apply rubbing alcohol to a cloth and rub the adhesive residue until it is removed.
- Remove Permanent Marker:
- Whiteboard: Scribble over the permanent marker with an erasable marker, then wipe it off.
- Glass: Apply hand sanitizer to the area with a permanent marker and wipe with a cloth.
Materials: Rubbing alcohol, cloth, erasable marker, hand sanitizer
Conclusion
We hope these 29 cleaning hacks help transform your cleaning routine and make maintaining a spotless home a breeze. With these smart, cost-effective methods, keeping your home clean doesn’t have to be a daunting task.
Have you tried any of these hacks before? Which ones did you find the most helpful? We’d love to hear about your experiences and any additional tips you might have in the comment section. Share your thoughts and ideas with us, and let’s keep our homes shining together!